Showing posts with label relaxation. Show all posts

Wednesday, 27 February 2013

Roasted Tomato Pasta Sauce TO FREEZE


After following this guide to growing awesome tomatoes you will end up with dozens of tomatoes! We have slowly been picking a few tomatoes over this past month as they start to ripen, but this week we had a bumper harvest where the majority of our tomatoes became big, juicy red fruits at the same time!


Like all good gardeners, we wanted nothing to go to waste. No tomato to sit too long in the fridge and become inedible. So I was looking at ways to preserve these beautiful rubies. Freezing whole tomatoes is a no-no. It destroys the flavour and the texture goes funny. Not nice. Sun-drying tomatoes is great, but I didn't have a dehydrator, we don't get hot enough temperatures in New Zealand, and I don't like the idea of leaving my oven on for up to 40 HOURS!! 

So, I decided that my best bet to preserve flavour not just the fruit, was to make a pasta sauce. And what better way to intensify tomato flavour than to roast them first! And the great thing about this sauce, is you don't need to stand over a hot pot for hours! You just need an oven and a food processor!

So here is my recipe for ROASTED TOMATO PASTA SAUCE

(from 45 normal sized tomatoes, I got 1.8L of pasta sauce!)

INGREDIENTS:
-tomatoes
-salt
-pepper
-oil
-crushed garlic


1. Wash all the tomatoes you have on hand. I had around 45 normal sized tomatoes. And preheat the oven to 160 degrees C (320F).
2. Slice the tomatoes in half and place cut side up on a baking tray. I had a couple of yellow cocktail tomatoes so I chucked those in too to roast.
3. Drizzle the tomatoes with oil - I used canola cos that was all I had, but olive oil can be used instead if thats what you have!
4. Season generously with salt and pepper.


5. Roast the tomatoes for half an hour, and after this time pour off all the liquid on the trays (there will be a lot).
6. Return to the oven for another 5 minutes just to get a bit more colour on the tomatoes, as this will be more flavour!!


7. Brush the tomatoes with crushed garlic so that there is a little bit on each one.
8. Wait for the tomatoes to cool for about 20 minutes on the trays and then transfer to a food processor. I used a magic bullet!


9. After processing, the pasta sauce will be thick and creamy and absolutely delicious!!!!


10. At this stage I transferred the sauce to snaplock bags in serving sizes, which I then labelled and put in the freezer! However, if you are going to use it straight away then you can add any herbs that you would like! I kept mine nice and simple, and when I use the pasta sauce, I will season with herbs to match the dish!


 11. This pasta sauce can be used as a pasta sauce, or in pasta bakes, or even in lasagna! Yum yum yum! Just place in a pot or a microwave proof dish to slowly defrost so that it can be used!


ENJOY!

Monday, 11 February 2013

Making a raised flower bed

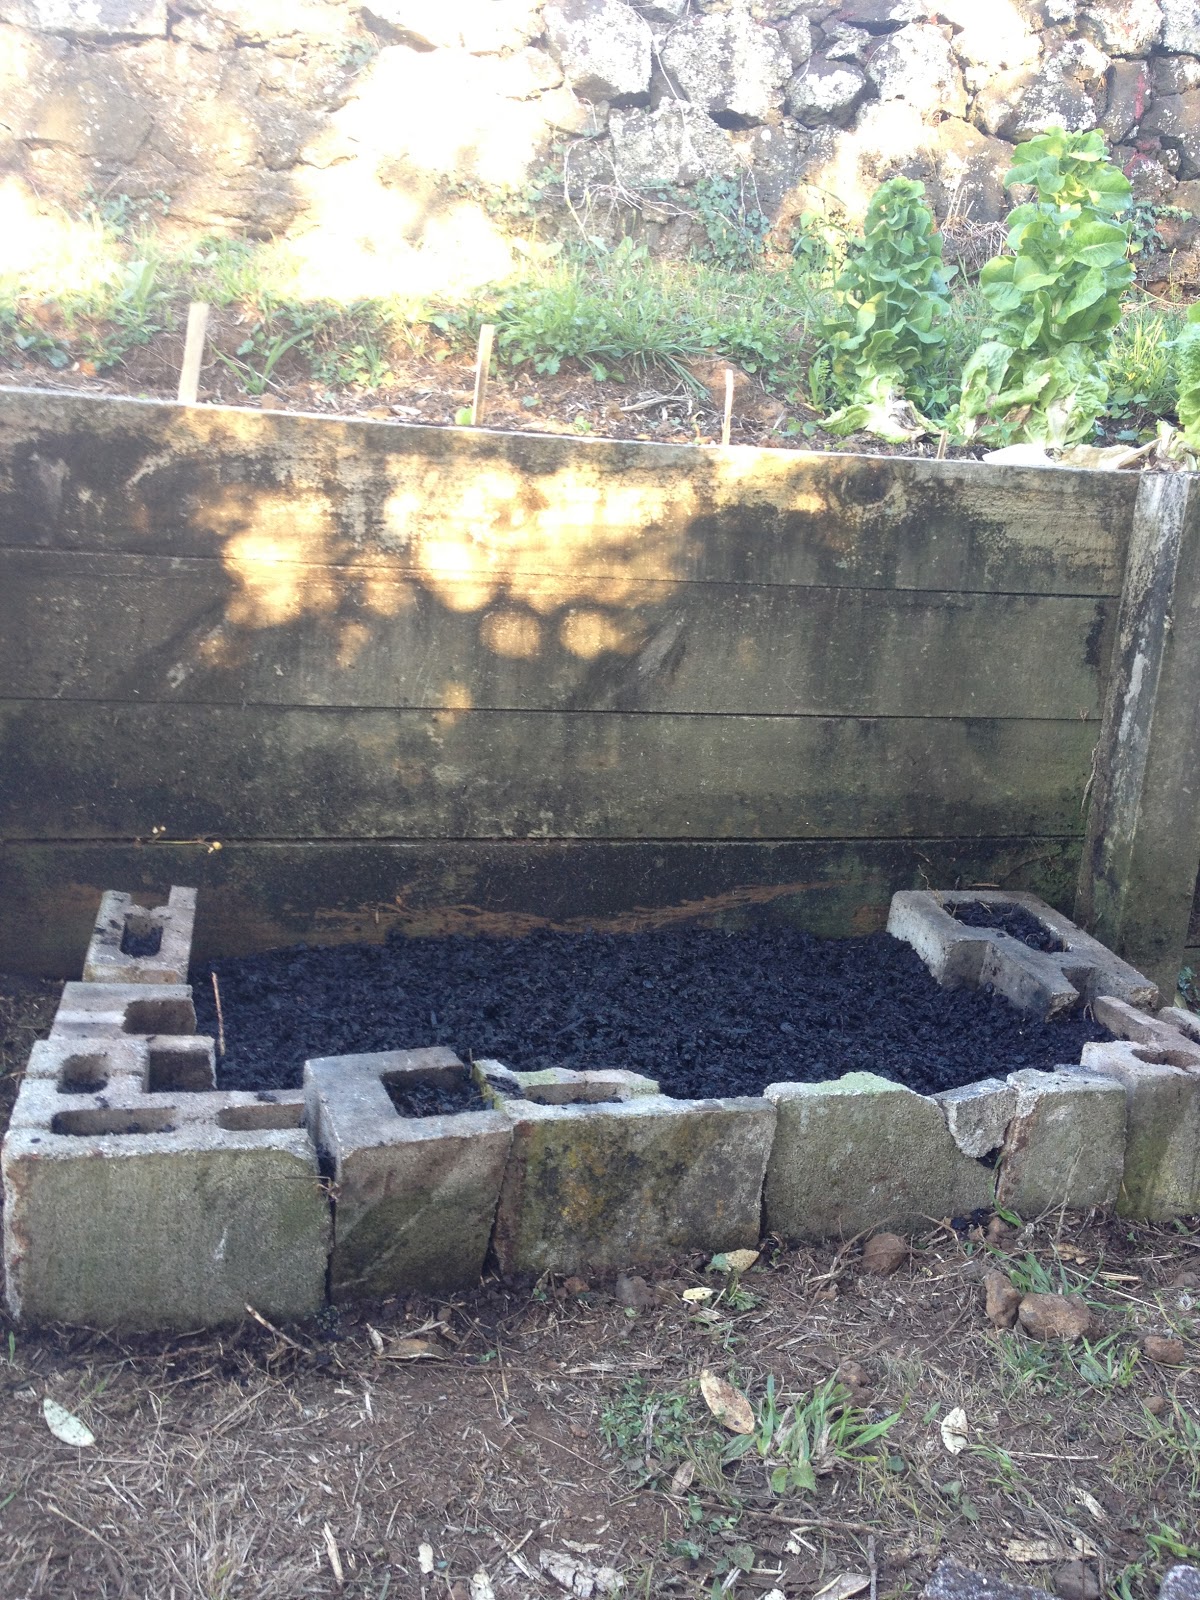
So today, we killed two birds with one stone. Or rather, cinder blocks (hehe). We had an old incinerator  next to our veggie garden that was a) ugly, b) stopping us from extending our veggie garden and c) made of bricks. Which was great because a) I wanted more planting space, b) I wanted to get rid of the incinerator and c) I didn't wanna spend a lot of money!

So here is my guide on how to build a cheap raised garden (even if you don't have an incinerator you wanna get rid of)!


1. Mark out the space that you want to create your raised garden in! To start with we laid out left over stakes from the tomatoes. These were easy to move around and gave us a good visual representation of how big, and how practical the garden was going to be.
2. Assemble the materials. You'll need a spade, some soil and some organic compost, and the bricks/rocks that you are going to use to make the garden.
3. Using the spade, cut into the ground, to mark out the space.
4. Dig a slight trench into the ground about the width of the bricks, so that they can sit easily in the ground, while being level, and not tipping over.
5. Dig up the grass or dig over the soil that is the base of the raised garden at the moment.
6. Place the bricks in the ground, and then fill the garden with soil and compost until the bricks are firmly in the ground. Packing the soil round the bricks, while moistening it helps to do this!
7. The bricks I used had holes in the top of them, so I filled these with soil to create extra weight, and so that flowers can grow in them too! You can do this too if the bricks have space, or otherwise just skip it!
8. Water the garden until the compost and soil is moist.
9. Plant whatever seeds or seedlings you would like. I am turning mine into a flower bed, so I planted a mixture of flower seeds!
10. Water well and enjoy your new raised garden!


P.S. It doesn't need to look pretty, cos once the plants are growing, its going to look amazing!!

Our Garden Progress - February


How to freeze courgettes - Courgette Soup!

If you have ever grown courgettes, then you know that you end up with a lot of courgettes in a very small amount of time. And recently we have ended up with a lot of courgettes! And a few surprise marrows!


And there is only so much grilled courgette you can eat until you start to get a little sick of it. So we were looking for some ways to preserve (or freeze) courgette, so that we don't have to eat it all now, and so that we can have some at a later date. And most importantly, we don't waste any of the delicious veggies from our garden!! 

So I set out to do a bit of research on the best way to preserve (or freeze courgette). I don't have a lot of spare time at the moment, so I was looking for something that meant I didn't have to put a lot of effort in, and wouldn't mean I had to slave for hours. What I found from my research is that you can blanch and then freeze courgette, but many people didn't recommend doing that, as when the courgette is reheated, its rubbery and not that nice. I didn't want to cut up nicely, then blanch, then freeze my courgette babies, only for in a few months to reheat it and then avoid it in my meal. Someone suggested that it is better to create a meal with courgette in it first, and then freeze it, such as chocolate courgette cake (not technically a meal, but I could eat a lot of it in one sitting!), or a courgette soup! I had never tried courgette soup before, so I thought I would give it a go, because soup in winter is divine and so easy to reheat! And the best part of this courgette soup (in terms of preparation) was that the hardest part was cutting the courgette and that was it. Easy! Just what I needed!

COURGETTE SOUP
The great thing about soup is that you can basically make it up, so just judge how much you need, based on how much courgette you have!

Ingredients:
-Oil
-Garlic
-Onion
-Courgette
-Beef, chicken or veggie stock
-Chili flakes
-Pepper

1. In a large pot, heat oil over medium heat. Add onion cut into quarters (as much as you like), and then add as much garlic as you like. I used one onion, and 1 tsp of crushed garlic. Sauté for a couple of minutes until the onion starts to brown a little.
2. Add the sliced courgette to the pot. I had about 7 to 8 cups of sliced courgette, but just use as much as you have!
3. Add chili flakes to the courgette. I used about 1 1/2 tsps. Saute the courgette with the chili flakes until the courgette starts to brown.
4. Add enough stock to cover the courgette. I needed 2L of stock, and I used a combination of chicken and beef stock.
5. Crack as much pepper into the pot as you like, and then increase the heat until the stock comes to a boil.
6. Once the soup is boiling, reduce the heat and then simmer. I just left the pot for an hour (to be honest I forgot I had the pot on the stove! Oops!), but you can just leave it to simmer until the courgette starts to break apart easily.


7. Take off the heat, and allow to cool.
8. Once cool, liquidize the stock. You can do this with a stick blender, or transfer in batches to a normal blender.


9. Either eat the soup straight away, or transfer to plastic containers in serving sizes, so that reheating it is very easy!
10. Place in the freezer!
11. To reheat at a later date, put the soup in a saucepan, or in a microwave proof bowl and stir at regular intervals to reheat it well.


Courgette soup is one of our new favourites!! Didn't even know it existed a week ago, and now we have 6 servings of it frozen to eat in winter!! YAY!


Tuesday, 5 February 2013

"Whats ready in the vegetable garden" Soup

Sometimes you just feel like a dinner you can whip together in seconds. No need to go to the grocery store to get ingredients. Or spend hours slaving and chopping away. "Whats ready in the vegetable garden" soup is one of my new favourites. This was also combined with "What do we have in the fridge that we need to use up" soup last night.

So here is my Monday night dinner - an extremely versatile soup that literally will be ready once the veggies are chopped and the soup is boiling. Basically, use as much as you like, of what you like, and adjust the ingredients based on how much you need, and how much you have!


INGREDIENTS:
-Canola oil
-Bacon
-Swiss chard stems
-Corn
-Courgette
-Carrot
-Frozen spinach
-Chicken stock
-Noodles
-Pepper

METHOD:
1. Heat the oil in a medium sized saucepan, and add the bacon.
2. Cook until the bacon starts to brown, and then add all the chopped vegetables that you want.
3. Stir and continue to cook until the vegetables begin to colour a little. This colouring will be some yummy flavour!
4. Add enough chicken stock to cover the vegetables, and then bring to the boil.
5. Once the soup is boiling, reduce the heat and let it simmer for a couple of minutes.
6. Bring soup back to the boil and add the noodles.
7. Boil until the noodles are cooked.
8. Taste and then season with pepper.
9. Serve and enjoy!!!

How to grow plants from seed

Planting seeds. It sounds like a simple task, but many people find it scary, and therefore opt to, instead of taking on this "challenge", buy seedlings to plant in their garden. Planting seeds is a very rewarding experience, that lets you know, exactly what your plants have been through to get to you! There is something so amazing about eating fruit or vegetables from a plant that you know started as a small seed that you planted and helped nurture as it germinated and then started to grow!


So here is a simple guide on how to grow plants from seeds!

To get started all you need is a packet of seeds (ensure that it is the right time of year to grow the seeds you have chosen), either potting mix or seed raising mix, and some containers to grow the seedlings! I used jiffy pots, which can be put in the ground as they are environmentally friendly and are bio-degradable! But if you don't have them, you can use empty egg cartons or small pots! OR seeds can be planted straight in the ground! I used seed raising mix, as it contains nutrients that specifically feed seeds and encourage germination, but if you don't have this on hand, potting mix works well!


Fill the container that you have chosen with soil, and then water until the soil is moist. Plant the seed in the soil. Follow the directions on the seed packet about how deep the seed should be planted. But most seeds should be planted a couple of mm under the soil. Make sure that you keep track of which seeds you have planted where! It makes it easier to companion plant when you are getting ready to move the plants to the big garden!!


Place the seed tray in a spot that gets good morning sunshine, as well as some shade in the hottest part of the day. This means that the seeds will grow well, and the soil won't dry out. Make sure that you water the seeds everyday, but that the seed tray doesn't flood, or that the water doesn't pool, as this can damage the seed.


After a week to two weeks small green plants will start to sprout! It is still important to ensure they are getting morning sunshine, and adequate water. Once the seedlings are well established, they can be transferred to the main garden!

Easy as pie!! Enjoy your new lease on gardening!

Now that you know how to grow seeds, check out Part 2 on how to grow plants from seed. This will give you some more tips and tricks that will help you out heaps!


Wednesday, 16 January 2013

Taming the TOMATO


Our tomatoes are getting us so excited at the moment!!! Look at all the gorgeous green fruit that will soon be ruby red juicy tomatoes! AHH!! SO EXCITING!!!

However, as the plants grow heavy with fruit, there are a few things that need to be done in order to ensure good growth and also a tidy and tall plant! (Sometimes I am a perfectionist, and if my garden doesn't look tidy it can bother me! Hahaha). So some of the keys to taming tomatoes are first of all, to stake the tomatoes as they grow. This is extremely important!


Another key to growing tall, strong, overflowing tomato plants is to keep tying the plants to the stakes as they grow taller! This prevents the plants from snapping as they are growing, because sometimes there can be strong winds that catch both you and the tomato plant off guard! And nothing is sadder than a fruitful tomato plant snapping due to the weight of the tomatoes because it hasn't be tied up! To tie up our tomatoes, I use an old pair of stockings!

The stockings are good because you are essentially repurposing something you would have otherwise chucked out, and the delicate stocking fabric doesn't damage the plant! It allows water and air to get to the plant also! One pair of stockings makes a very decent amount of ties for the tomatoes. I think I got around 13 or 14 ties out of one pair of tights! So it is definitely worth not throwing out those laddered stockings!


Another way to tame tomatoes is to remove the suckers or sometimes called laterals! These are the little leaves (or stems if you leave them long enough) that grow between the main stem and the main branches coming of of the plant. They tend to grow on about 45 degree angles, and are easy to spot, once you know what you are looking for. Its important to remove these for visual purposes (makes the plant grow up rather than out) and also for practical purposes, as these little leaves will grow into branches if you leave them. These branches will take nutrition away from the branches growing fruit, as often these suckers don't produce fruit! So when you see one, pinch it off! Easy as that! And if you don't like the idea of wasting these little guys, they can be turned into other tomato plants simply by leaving them in water in a dark place for a couple of days or until roots develop!


As well as removing suckers, removing any of the unsightly, discolored leaves around the base of the plant is a good habit to get into. Essentially anything on the plant that looks bad, isn't going to benefit the overall health of the plant. So when you see a little sucker, or a yellow/brown branch down the base of the plant, get rid of it!

These are all very simple and quick steps to take so that you will end up with beautiful, tall, strong plants that are literally heavy with fruit!

Tuesday, 15 January 2013

Growing Wheatgrass!

Wheatgrass is essentially a miracle plant. It is insanely easy to grow and then consume. It can be drunk in shots or added to fruit smoothies or juices, and the nutritional benefits are amazing! There is a lot of debate over HOW good wheatgrass actually is for you (1shot=1kg of veggies??), but what everyone can agree on, is that is good and does have a lot of goodness packed into a small package!

It is also unbelievably easy to grow and would be a very good starting garden project for those who would like to garden but think they can't!

So bere is The Cottage Veggie Garden guide to growing Wheatgrass in 7 days!

STEP ONE: Soak wheatgrass seed in water over night. I used 1 1/4 cups for the tray that I used as wheatgrass seed is sown in a single layer.

STEP TWO: Fill a shallow growing tray with soil and water until it is very moist.


STEP THREE: Place soaked seed in a single layer on top of the soil and press down very lightly. The seed should not be covered in soil, but rather just sitting in it.

STEP FOUR: Water well and place in a spot that gets a good amount of sunshine.

STEP FIVE: Water well every day. The seeds need a lots of water in order to grow well, but they shouldn't flood.

STEP SIX: Watch the wheatgrass grow like cray cray

STEP SEVEN: After seven or eight days (if you have forgotten to water it well) it is ready for you to harvest!

           
 STEP EIGHT: Dispose of roots and soil as the second growth of wheatgrass has only 1/2 the nutritional content!

STEP NINE: When preparing wheatgrass, ensure that you use a juicer, or strain out any of the little pieces of the grass with muslin cloth after blending with water in a blender, as they aren't good for you to consume!


 STEP TEN: Add to smoothies and juices, or be tough and drink a straight shot.

ENJOY!!!!


Thursday, 3 January 2013

Our first baby! (GROWING COURGETTES) - December 3 2012

Our 9 month wedding anniversary was the 3rd of December, and on that day, we harvested our first courgette baby! Its amazing how different home grown vegetables are to shop bought vegetables! Our courgettes are so fat!

The crazy thing about courgettes is that one day they are small and the next they are a marrow! Literally! A marrow is basically a giant version of a courgette that has a slightly different texture and taste. So when you are growing these bad boys, keep an eye on them! The ideal size for a courgette is about a pinky finger to thumb length! The other thing about growing courgettes is the plant can produce a lot! As you keep harvesting, there is more potential for new vegetables to grow, so having a few recipes up your sleeve that use these glorious vegetables is a definite must! I have a couple of unique recipes that I will post soon! But for now, enjoy this beautiful picture of our first courgette baby!


I don't know if its the volcanic soil we are blessed with or the perfect growing conditions or what, but seriously we are getting some big plants in a small amount of time! Look at these giant lettuces that we have! Luckily we have two families as well as us to share them with! Because that would be a lot of salad that we would have to consume!


We have also started growing peas in our garden! They are gorgeous plants that are very delicate looking and are truly just beautiful!


I will post some more about growing peas as well as some courgette recipes, but in the mean time, enjoy this photo of our glorious greenery!


Tuesday, 11 December 2012

Growing and growing and growing - November 8 2012


This week we have many radishes! So many that we cannot eat them all! So we are giving them to the in-laws! They are huge too!! It is seriously amazing how fast they grow! All you need to do is plant them about 5mm deep in soil and in a rows 30cm apart and make sure they are watered well! Once they start to sprout a bit, they may need to be thinned back so that they can grow to their full potential! And then in a few weeks time there will be delicious and peppery radishes to add to salads!


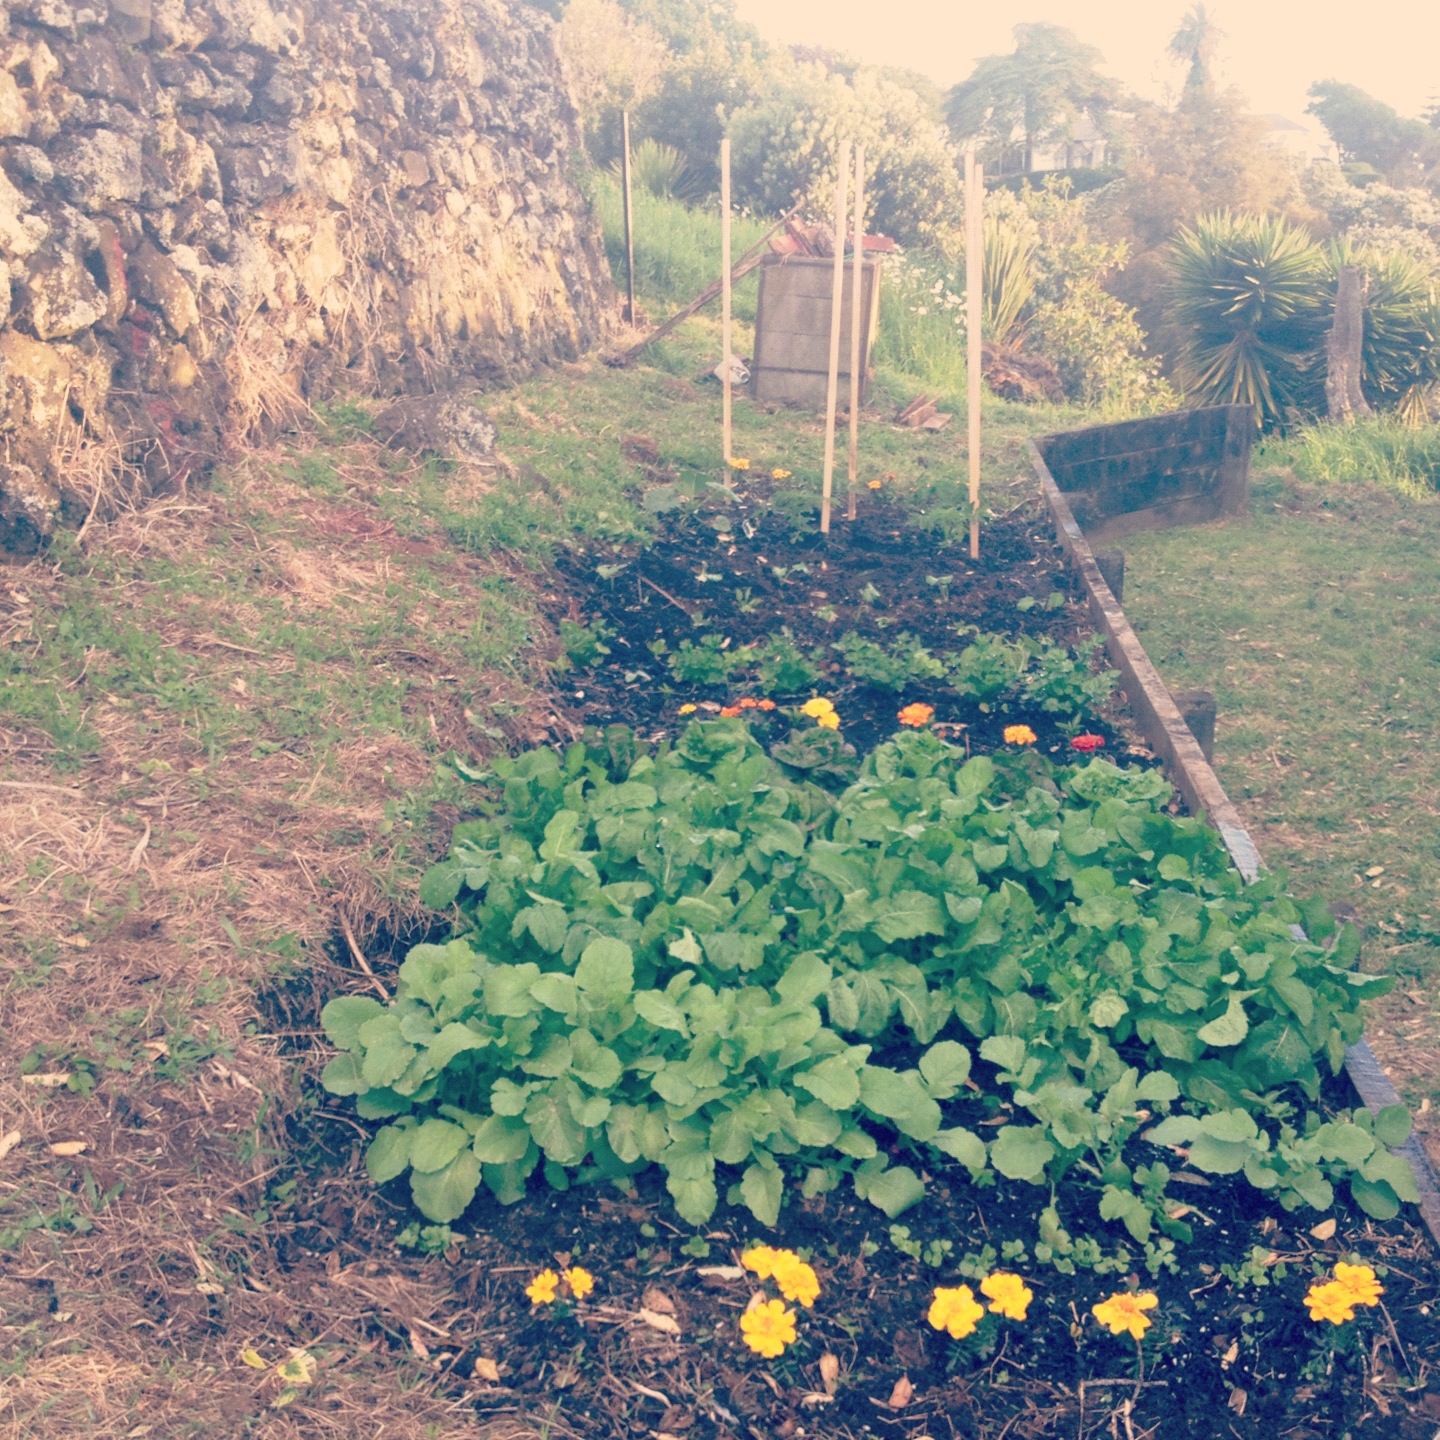
Today we extended our veggie garden out another quarter of the original length! It was so hard! And there were so many rocks and bricks! The top photo is before, and the bottom photo is after! Now there is more room for all the stuff that we want to plant! I am so addicted to gardening! Hahaha.

To clear the land we used a spade to "cut out" the square in the grass that we were going to dig out. Then we used a pitch fork to get rid of all the grass and roots. We used a combination of the spade and the pitch fork to dig up the soil and dig out the rocks and bricks and roof tiles! It was such a fun day even though it was seriously hard and back breaking work! After the ground was cleared we put compost on top and then planted some cocktail tomato plants and a tobacco plant (very strange!). And soon we will plant all the different seeds! Yay!!!


As well as extending our veggie garden, I have been growing my kitchen garden! I have now added fennel, parcelery (a mix of parsley and celery which I thought sounded tres cool!), garlic chives, coriander and a tomato plant! I also got some new gardening gloves! Such an awesome day of new additions to our gardening family!


Crispy Rocket Pesto Chicken Recipe - November 5 2012


As has been said earlier, we have an abundance of rocket in our garden! And we loooove rocket pesto.
So we came up with Crispy Rocket Pesto Chicken as a way to eat more of our yummy pesto and enjoy our garden in a more unique way than just eating salad!

So here is the recipe!

Crispy Rocket Pesto Chicken

-1 skinless, boneless chicken breast sliced into strips
-1/4 cup rocket pesto 
-1/2 cup milk
-1 Tbsp white vinegar
-1/2 cup plain flour
-2 pieces of bread made into breadcrumbs
-salt
-pepper
-1 Tbsp oil

1. Marinate the chicken in the rocket pesto for an hour or up to 24 hours in the fridge
2. Combine the milk and vinegar in a small bowl and leave to curdle
3. Put the flour into a small bowl and season well
4. Put the bread crumbs in a small bowl and season well
5. Arrange the bowls in front of you in this order: flour, milk, breadcrumbs and have a plate at the end to put the coated chicken
6. In a fry pan heat the oil over medium heat
7. Dip one chicken strip into the flour, then the milk and then the breadcrumbs so that it is covered well
8. Repeat with the remaining chicken strips
9. Place the coated chicken strips into the fry pan, and cook until golden and the chicken is cooked completely

We served our chicken on a lettuce and rocket salad with radishes all from our garden and peanuts (from the supermarket). We dressed the salad in a dressing made from 1 part lemon juice, 2 parts oil and salt and pepper! It was an amazing dinner that was so fresh and light! It will definitely become part of our dinner repertoire!

Staking the tomatoes - November 5 2012

Its always exciting when there is noticeable progress in a garden! And new additions to the garden that changes the way it looks is almost refreshing!

Today, we had to stake up the tomatoes! They were starting to bend over slightly. So before any major wind or rain happened upon them, we secured them up!


We bought one stake for each tomato, that would be tall enough to accommodate their future growth. Once the stakes were hammered into the ground next to the plant (deep enough to not just fall over), we tied them to the stake using old stockings (pantyhose) that had been cut into about a 4cm thick ring, and then cut into one piece of pantyhose ribbon. Using the pantyhose is good for the plant because it is breathable and not very abrasive! It is also really good for me, because I seem to wear a pair of pantyhose once and then there is a ladder in it! So it is good recycling!

As the tomato plants keep growing, we will keep tying them up on the stake! This helps the plants to grow really good and strong, and will stop them from breaking in any not nice weather!

The garden is growing so amazingly well! It is unbelievable! The radishes are looking a lot more promising (but then again they are super easy to grow), and the rocket is really taking off... (lol)


Here is another photo to show you how amazing our garden is! On Guy Fawkes, we went up to our veggie garden and watched the fire works across the city! Totally beautiful and not that scary until our neighbours starting doing fireworks that were sending sparks awfully close to our plants! Eek!


Monday, 10 December 2012

I NEED MORE PLANTS - November 5 2012

Here in New Zealand, we are now well and truly into spring, and summer is just around the corner! The prospect of many new plants is exciting beyond belief and beyond words!

The other day, I was watching Food TV, and an ad came on TV for POD Gardening. And so I checked out their website http://www.podgardening.co.nz/!

This may have been a blessing for me, but not a blessing for my bank account! I found their online store, and before I knew it, I had added to my cart many seed packets of things that I was desperate to grow! And we all know that the joys of online shopping don't end once the transaction is complete, because the package gets shipped to your house a few days or weeks later and getting mail is normally always exciting (especially if you don't have to pay bills yet!).

But when my package arrived!!!!! OOOOHHH BOOOY!!!!! I WAS EXCITED!!! So excited that I laid it all out and photographed it along with a cute hand written note that was inside!! SUPER CUTE!!!


Now I am even more excited to get to plant the seeds! I ordered some interesting and exotic sounding things like rainbow carrots and rock melon, black krim tomatoes and butternut squash! Because I spent so much, I also got 5 bonus packs of seeds! The Cottage Veggie Garden is going to have a bountiful (hopefully) harvest!

So please bare with (Miranda reference) while I experiment with not only growing from seed (for the first time since science class in high school with an unsuccessful bean plant which crushed my gardening hopes and dreams) but also growing things that are so much different from the trusty, faithful lettuce and rocket that basically promise to grow and grow for you!

Homemade Rocket Pesto - October 26 2012


When life gives you lemons, you know to make lemonade. But when your garden gives you wilting rocket, what can you do??

We made rocket pesto!

A very quick and delicious way to use some of our vegetables that were starting to become a bit worse for wear.

The thing is, there are just two of us. So we don't eat a lot. And we didn't have a lot of rocket. And we have a big food processor, who's blades would have missed the ingredients we were hoping to turn into pesto. And it was a night where we didn't want to muck around making dinner. We also didn't have pine nuts, or parmesan... So this is a pesto with a lot of Kiwi ingenuity!

So here is the recipe for our Rocket Pesto (in a flash):

-1/2 cup rocket
-1 garlic clove, minced
-oil (we used canola because olive is tres expensive)
-salt
-pepper

1. Chop the rocket as finely as possible.
2. Transfer to a small bowl.
3. Add the garlic.
4. Using a fork, slowly add oil and mix well until the desired pesto consistency is reached (about 2 Tbsp)
5. Season to taste!
6. Serve with fresh cooked pasta, or spread on crackers, or whatever else you do with basil pesto!

The rocket pesto is beautiful and peppery! Coming from our own garden is really amazing and feels so rewarding! It is such an easy plant to grow, and it grows so fast that really everyone should grow it! And then eat it! Yum yum!!


The start of my "Cottage Kitchen Garden" - October 25 2012

Having a garden is amazing! And the view we have is absolutely breathtaking...

BUT...

At the end of the day when you are cooking dinner and the recipe calls for some fresh basil, you don't really want to trek all the way up the hill to a garden to get some basil...

Our solution!!!

Build a garden on our deck/patio/whatever-you-want-to-call-it space! 

After many a hour looking at small patio gardens on Pinterest, I decided that I too needed one. And so it begins! My/Our patio, or kitchen garden! (Kitchen because when you are in the kitchen, you can pop there easily!)


This is my rocket and spring onion, first additions to the garden, that is going to grow like cray cray!

I planted rocket seedlings in potting mix and a galvanized bucket that I had lying around (it had holes in the bottom perfect for good drainage!) and then watered it well! In the other bucket, I planted in potting mix the roots of a leftover spring onion and then watered it well. It is as simple as that! So long as they are getting adequate sunlight, they will be very happy, and will soon be getting more friends!

Here is my latest post about having a garden on a small patio space!

Wednesday, 5 December 2012

The first taste - October 25 2012


A month after planting, we had our first taste of natures goodness that we planted! Some delicious, peppery rocket! As we grew the plants from seedlings, it didn't take that long for us to get some yummy and edible produce! The greens were starting to grow really well, and growing the salad greens was such a confidence booster, as they are very easy to grow and maintain! All you need to do is water it well and keep slugs away! 

To keep the slugs away from the plants and stop our yummy greens being eaten by bugs, we used crushed egg shells in the garden! Using the egg shells in the garden is also good because of the nutrients it provides to the soil! This is good because the calcium in the egg shells is essential for plant growth!!! All you have to do is wash the egg shells after you have cracked them. We kept them in the fridge to dry out, and then before we used them we crushed them up into very small pieces to sprinkle on the garden. Crushing them up means that they break down easier, which means the nutrients gets into the soil and plants faster! SUCCESS!!!


I love the beautiful view from our garden! Absolutely amazing when you are watering the garden and then look over and WOW!!!! The sunsets are so beautiful and we are so looking forward to the summer evenings we can spend up by the garden! We are so blessed with the amazing landscape we are surrounded by!!


Tuesday, 4 December 2012

Patience is a virtue - October 12 2012

One thing that I struggle with is patience! If I want something, I want it now!! And waiting is not ideal! I am the kind of person who will drive the extra long way to get somewhere, rather than the short traffic blocked way even if it will take the same amount of time, just so I don't have to wait in traffic! Strange but true!

So for me, waiting for the veggies to grow in the garden is something that I am learning to love! Taking time after a busy or stressful day to go up and enjoy the beautiful spring evening and water the plants is becoming a relaxing ritual that I am trying to not take for granted! It is also such an amazing and unique way for my husband and I to spend time together!

And watching the plants grow and grow is almost ALMOST as exciting as the prospect of being able to eat them!! Patience, however is a virtue!! Because it does take some time before you can actually eat the vegetables of your labours! Especially if you are planting from seed! Which we are going to give a go!

Something that I have learnt is just how rewarding and relaxing gardening is! Being able to watch something you have created prosper is simply amazing and totally awe inspiring!!

I AM ADDICTED TO GARDENING NOW!


Saturday, 24 November 2012

Planting the first veggies - September 30 2012


 After all of the hard work removing rocks and bricks and digging lots and lots, the exciting day came when it was time to plant veggies! We started with some lettuce, rocket, radishes and tomatoes, as well as some other easy things to grow! Now comes the part where we have to be patient and wait for our first mini harvest! Eek! EXCITING!

Tuesday, 20 November 2012

The hard part starts - August 27 2012


Just when we thought that the hard part was getting the grass under control, then came the digging! Little did we know that under the grass was lots and lots of stones and bricks! My husband and my father did all the hard work, and it sure was hard work from what they told me. So hard that by the end of the day, a small patch (about half the size of what we wanted our garden to be) was dug up and cleared of stones! 

The rocks and the bricks were a slight obstacle that we hadn't considered, but clearly getting all the debris out of the soil was going to be a challenge!