Showing posts with label nature. Show all posts

Tuesday, 3 September 2013

How to grow plants from seed - Part 2

I am a huge believer of growing plants from seed. To me it is so much more rewarding to plant my plants from seed. It truly is so easy! You just need a little patience and a few tips! If you haven't seen it already, check out Part 1 of this guide on how to grow seeds, cos that will help you with the basics! This part of the guide will give you a little bit more detail and tips that aren't essential, but really help out! So lets get into it!

My first trick or tip when growing seeds is to use a propagator, or an equivalent. This creates a micro-climate for the seeds in which to thrive. This micro-climate helps to keep the plant warm, and retain soil moisture. My Dad bought me an electric propagator, so I use this! It makes such a huge difference! I just put it in a sunny place, adjust the vents and turn it off an on when appropriate. If you wanna get super technical (which I don't bother with) you can use a propagator thermometer so as to get the ideal temperature for the plants to grow. But I just turn it on for a few hours in the cold parts of the day!


If you don't have an electric propagator, don't even worry! You can use things like plastic bags, plastic containers, or even plastic soda bottles with the bottoms cut off. These things all help to create essentially mini glass houses. The plastic soda bottles with no bottoms can also be used to help protect the plants when they go out into the big garden. The bottle lid makes it easy when it is out in the garden for you to water the plant too, as you simply unscrew the lid and water the plant! Talk about repurposing (;

Now I'm going to teach you about a little problem you may have encountered if you grow your seedlings inside. Mold. It is not nice. It starts out like little white fluffy spots on the top of the soil, and can spread across the whole top of you soil. It won't really affect your plants, but its preferable to not have this! This mold is caused from either over-watering or from your plants not having enough air circulation around them.

The great news is that it is super easy to get rid of the mold. You have a few options for treating the mold:
  • Sprinkle a little bit of cinnamon on top of the soil (it actually does work)
  • Place a fan near your plants to increase circulation
  • Or, simply remove the layer of mold and make sure you aren't over-watering your seeds


Mold starting to grow on the soil of a seedling

Now that your plants are starting to grow and you know how to get rid of any mold that may start to sprout, here is an ingenious tip that when I got told about this I thought it was brilliant. Its so simple, but makes so much sense!

When you plant your seeds, no doubt you plant a couple of seeds in each little pot, and if you don't, then start doing it!! What will happen when you start growing these seeds, and the plants germinate and start sprouting, you will have a couple of shoots. Once these shoots have sprouted their true leaves (when your seeds sprout, they will start out with two leaves right opposite each other, as the plant starts to grow and develop, other leaves will start to grow which look more like the leaves that the plants end up with - hence the name, true leaves) you are ready to use this trick!

True leaves - sourced from about.com
Grab your scissors, and cut at the base of the stem of any "extra" plants that you have grown. Choose to keep the ones that look like they are doing really well! I know what you're thinking, because I thought this too "what a waste, I will just plant all the shoots". Well by all means, go for it! However, what changed my mind was the justification behind doing this. When you try to separate the shoots, you can actually damage the roots of both plants, as they will no doubt be connected. Its actually better to sacrifice one plant then lose two! Then once the plant is a little more established you can move your plant out to the garden! It is super important to make sure that once the true leaves have started to grow that your plants are being fed and getting enough nutrients! But I'm sure you already could guess that!


How great were these extra tips?! I know that these tips totally changed my seed growing experience! I hope they help you out! Let me know if you have any sneaky tips that I could use when growing seeds! Sharing is caring :D

Monday, 19 August 2013

The Changing Seasons

WOW! How fast does time go! Its already heading towards the end of August. And for me that means its almost Spring! But no matter where you are in the world, you will be preparing your garden for the end of one season, and the beginning of another. Even if you still have a few beauties producing in your garden, chances are it won't be anywhere near as impressive as it was a few weeks ago! So this is the perfect time to give your garden the love that it needs!

For us heading into Spring now is the ideal time to pack your soil full of nutrients so that when it comes time to plant in the ground in a few weeks time, your soil will be bursting with goodness! I pack heaps of organic compost and organic fertilizers into my soil at this time of year, and it can be as simple as that! If you want to read up on it more, here is a great post about how to love your soil. Don't forget to keep on loving your soil! Cos what goes into your soil, goes into your yummy veggies!!

Adding the right things to your soil can make a huge difference!

Another super important thing to get started on at this changing seasons time is getting your seeds started sprouting! No matter where you are, if you are planting from seed, now is the ideal time to get some seeds germinating in a warm place! If you have never grown from seed before, heading into Spring is the perfect time to overcome your fear! For a fuller guide on how to get your seeds started, check out this post I wrote about how to grow seeds! I have my seeds growing in little jiffy pots in a warm place in my house! Its important to make sure that these seeds get enough water and warmth so that they can reach their full potential!

I also like to plan ahead the times when I will sow more seeds, so that over Spring and Summer I can have lots of vegetables growing! I get my slower growing things started first (carrots, pumpkins and chillis), as well as a few fast growing things (lettuces and radishes), and then plan in for more fast growing things later on as well. This helps me to make sure that I will have a steady flow of veggies during the warmer months! Planning out what I am going to plant also helps me to get an idea of how many plants of each variety I should grow, so that there is enough for not just me and my hubby, but also that we could share or sell some of produce!

Planning out seed planting can really help to get your head around growing times

And if you are anything like me (a gardening obsessive compulsive) you will have so many seed packets that you almost don't know what to do with them all! Well I have a simple solution! Organize them! I did this the other day again, as I keep adding more seeds to my collection as I see new and exciting vegetables I want to grow (Wow! Gone are the days as a kid where I used to think veggies were boring!). I laid out all my seeds (this made me super excited) and then alphabetized them! You can organize them however you like though! Whether its season, vegetable family or colour, growing time, I don't know! Whatever makes your life easier! And then I put them into my seed album (which secretly is just an old photo album that never ended up being used for photos!). But seed boxes work also! Just so long as you have a safe, dry place for storing your seeds! Is it weird that I am super excited for more of my seeds to arrive in the mail this week so that I can not only plant but also organize too?? Probably! But hey! Whatever makes you happy right?!

Organizing seed packets helps to make sure you don't lose or miss out on any potential veggies!
The changing of seasons is always exciting as it means you have new things to look forward to! Just make sure that it doesn't just creep up on you, but that you are super prepared and waiting for it! 

HAPPY GARDENING!

Saturday, 6 July 2013

Preserving Carrots and Parsnips for ROASTING

 I love carrots!! They are a simply wonderful vegetable that can often test your patience, but they are so worth it! Its hard growing something that you can't look at and see its progress, and so when one carrot is ready, I get so excited and pick them all. (If you wanna know more about growing carrots, check out my previous post about carrots!) This week, I picked some carrots that I had (sorta) forgotten about and some parsnips I had definitely forgotten about! It was so exciting!! See!! Look at me with some of my babies!


They were huge and such random shapes! But because I picked all these carrots and a few parsnips, I had to do something with them. What you might know if you have had a few garden harvests, is that generally home picked vegetables don't stay fresh as long as supermarket vegetables. So within a few days, the veggies would go bendy and floppy. Sad face!

My carrots with a 30cm ruler

And I love roasts. Roast chicken, roast pork, roast lamb, roast beef. YUM! But the best thing is not just the meat, but the vegetables! Oh my gosh! Roast potato, roast carrot, parsnip and onion! YUM! So instead of just boiling the carrots and then eating them straight away, or steaming them, putting them in fried rice, I DON'T KNOW! Whatever you want! I decided that I would save my carrots for a roasting day. Hehe. Get it! So here is how to preserve your carrots and parsnips for future roasting! GENIUS! If I do say so myself :D


To begin, wash your carrots and parsnips really well. They tend to be more gnarly than shop bought carrots, so lots of dirt gets trapped. Then peel them and wash them well again to remove the last of the dirt. After they are peeled, cut off any long bits that are super thin, as these will cook a lot faster than the rest. You won't want to use these bits but save them for something else like stock or soup!

Bring a medium sized pot of water to the boil. And salt well. While you are waiting for the water to boil cut the carrots and parsnips into even sized pieces so that the cooking time is the same for the different pieces. One the water has boiled, put a few at a time (I did like 5 or 6 at a time) in the pot. Allow them to cook for 4 or 5 minutes.


After cooking, immediately remove the carrots and run under cold water, or place in an ice water bath. Either way is fine. This is just to stop the cooking process, as even when the carrot is out of the water, it would continue to cook.


Continue the process with the remaining carrot and parsnip until all the veggies are cooked and cooled. Then you need to thoroughly dry the vegetables and place on a baking sheet with baking paper or parchment paper down. Make sure that none of the veggies are touching. Transfer this tray to the freezer for a couple of hours, or until the vegetables have started to freeze. They can then be moved to a plastic ziplock bag, or a plastic container, and stored in the freezer until you are ready to use them. 

When you are ready to roast, it is so easy! Just preheat your oven to 190C or 380F, and then put as many carrots or parsnips on a tray as you like. Drizzle with a little olive oil and sprinkle with salt and pepper. Bake in the oven for around 30 - 45 minutes, or until the carrots are golden and heated through. They can be cooked with other veggies too, if you are roasting heaps of veggies together.


Also, if you don't want to roast your veggies, steaming them works perfectly well too! Just get your steamer ready and pop them in the steamer for about 5 - 7 minutes or until they are soft and well heated through! And an added bonus, they can be easily microwaved! Just place them in a microwave proof dish, cover with a paper towel and microwave in 30 second intervals until the veggies are steamed and heated through.

Homemade carrots are so sweet and tasty! What better way to savor them, than to preserve them for roasting at a later date! I hope you enjoy your delicious carrots!

Monday, 1 July 2013

How to build a TERRARIUM

Terrariums are such a cool way to to bring plants inside, but also get people who might not be so keen on gardening, doing a little gardening! The terrarium trend is really sweeping florists at the moment, but you could pay a lot for something that is so much fun and so easy to make! They make great gifts and cool weekend projects. So here is my guide on how to make a terrarium!


To create your terrarium masterpiece, you will need:
-a glass bowl or container (can have a lid or be open)
-potting mix
-stones
-sand (if using a closed container)
-moss (can be sheet moss but I used sphagnum moss)
-small plants or succulents
-little plastic toys or decorative things


Having little plants is an important part of growing a terrarium. Plants can be trimmed and pruned while growing, but you don't want to have like a normal sized house plant being crammed into your small terrarium! You should be able to find small plants at your local garden centre or you can use succulents. But collect a variety of different colors and shapes. Having around two or three plants will be the most striking in your terrarium, but if you have a bigger one, then go crazy!


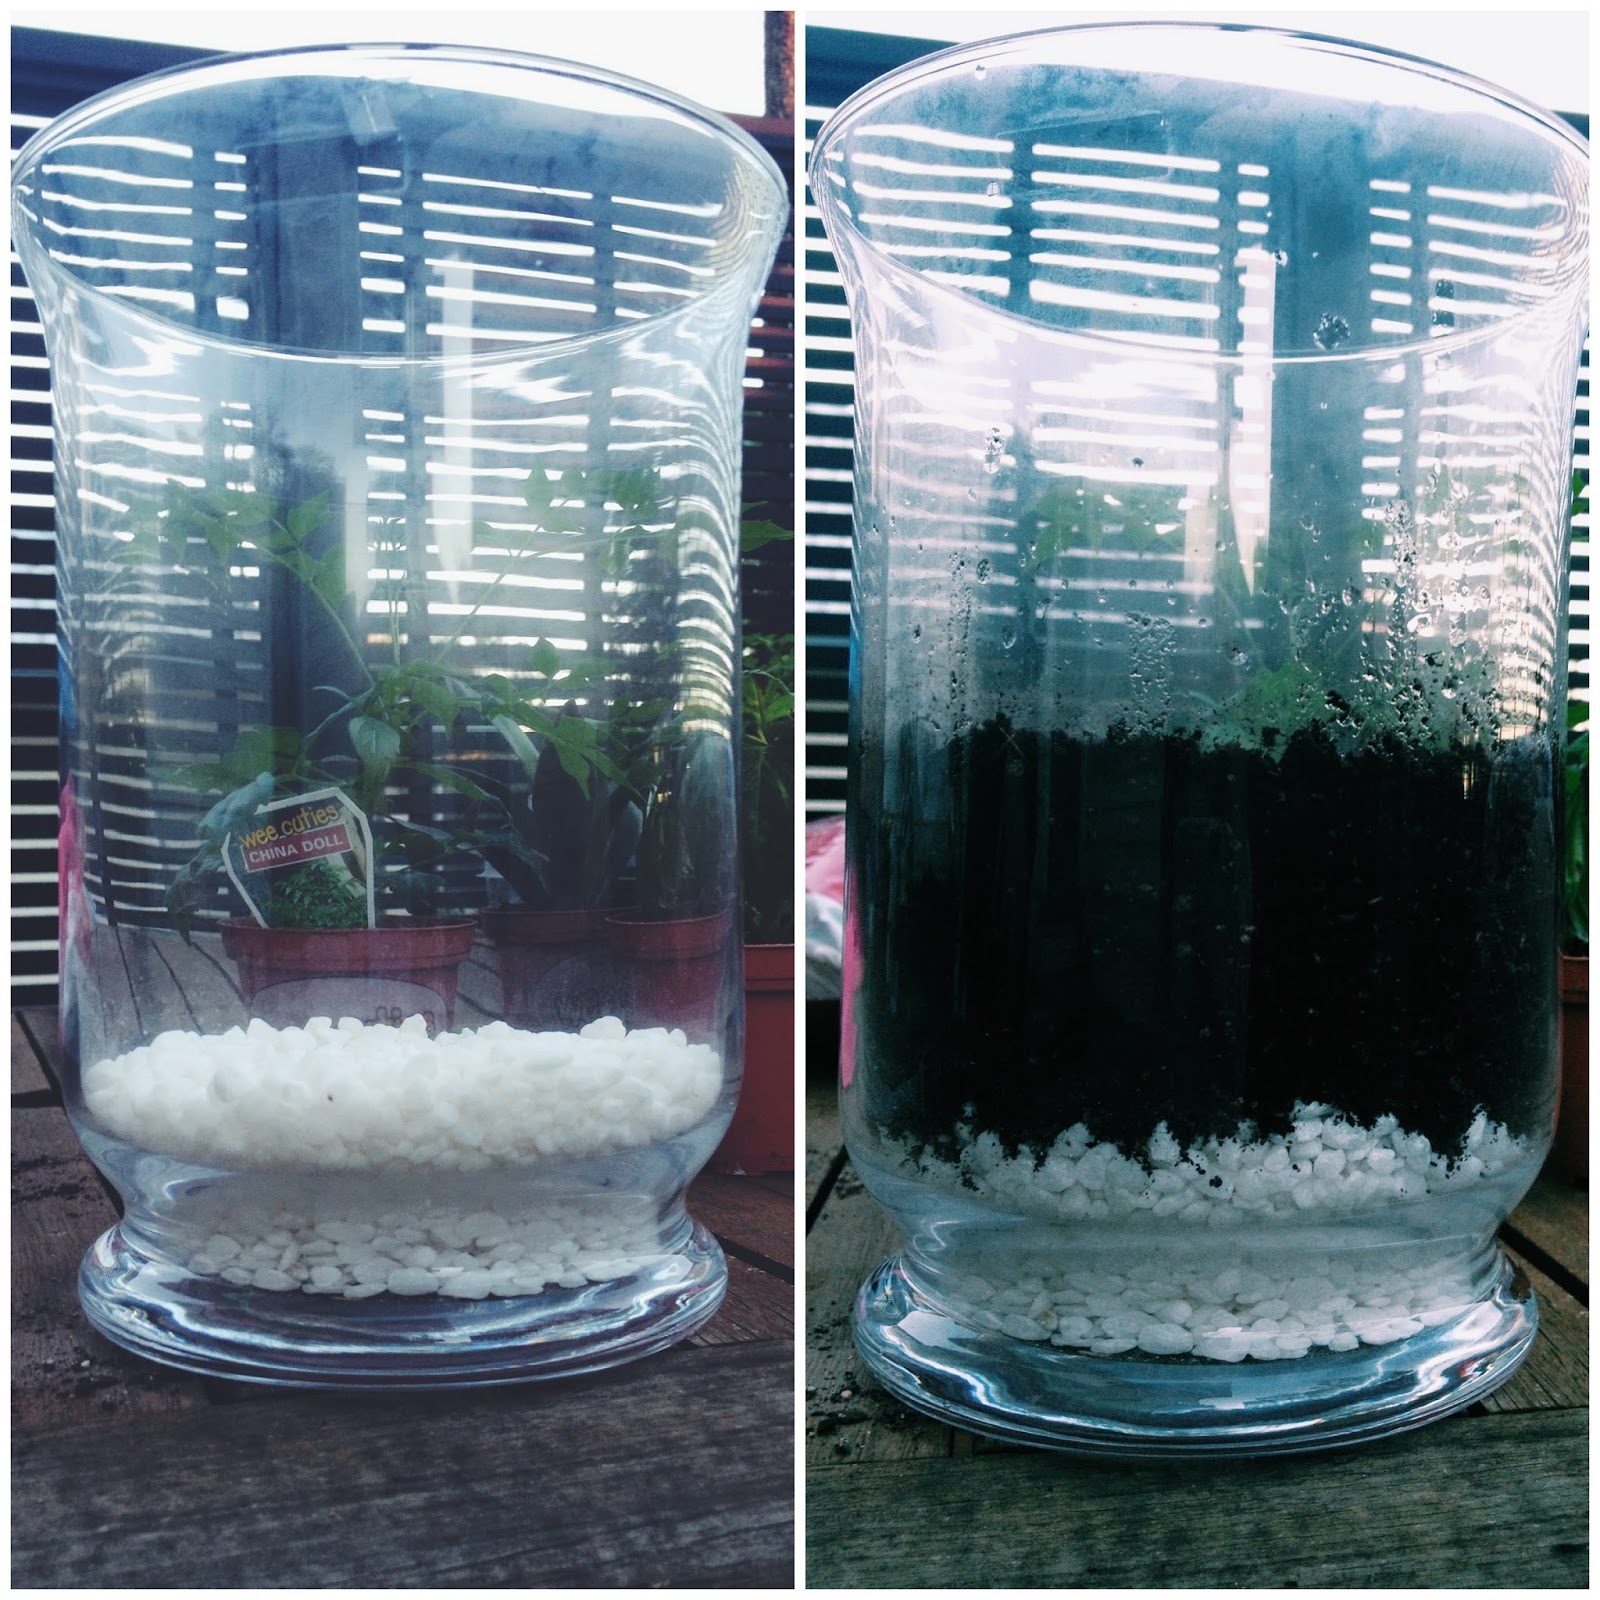
To begin with, make sure your container is clean and dry. You can use a recycled or repurposed container. But ensure it is cleaned with a mild soap and warm water first. Put a small layer of stones at the bottom. This will help with drainage, but also looks really nice. You can use any kind of stones that you like! Then on top of the stones, put your mixture of damp soil and sand (if you are using sand) and pat down gently.

Put the soil in carefully so as to keep the glass clean and not to mess up your pretty stones! Once your soil is in, just like as you do in the big garden create a small hole to put your plants in. Terrariums are about being creative, so just make it look however you want to! Once the plants are in pat the soil down firmly around the plant bases. I found that I needed to add a bit more soil, but you don't need to if you don't think you need to!


Once the your plants are in, put the moss down around the plants. This helps to maintain the moisture in the soil. As your terrarium grows the plants should be misted with water, rather than typical old fashioned water-can watering. If you terrarium has a lid, condensation will form on the sides of the glass. This creates a humid environment for the plants to grow in. If you are using succulents however, you may want to have an open terrarium as the conditions are better when they are open and the plants will have better lives! Sphagnum moss starts out browner when it is bought, but as it is kept moist, it changes to a green color which looks great in the environment.


The final stage of terrarium creation is putting in decorations. This stage can be skipped, but really anything can be put in. Shells, toys, beach glass. Whatever you like! We used dinosaurs, as this is the only way I could convince my husband to mini garden with me!


And voila! Your terrarium is complete! Keep an eye out for yellowing leaves, as this will mean something is wrong in your terrarium environment. If you have a closed terrarium, you won't need to water the plants as frequently, but the terrarium will occasionally need to be aired out. Water plants gently with a mister or spray bottle and enjoy your beautiful creation!


Wednesday, 1 May 2013

Capsi-YUM (growing capsicums)

Capsicums are delicious, crispy, juicy, sweet and oh so versatile. You can have them in salads, you can stuff them, roast them, have them on pizza. They add amazing flavor, and texture to whatever dish they are in. And the best part about capsicums, is that they are actually really simple to grow. I used to find the idea of growing capsicums really daunting, but after a long hot summer, I now think they are such an incredible thing to grow! This guide can be used for both capsicums and chillies!


When to grow: Mid spring to mid summer. If you live in a warm area, plant inside in late winter, and then put outside mid spring, and if you live in a cold area, plant inside in late winter or early spring and then don't put outside until after the risk of frost has passed.

Where to grow: Capsicums grow up (to about knee height) rather than out, so you don't need too much space around the plant. They do need a spot that gets a lot of sunlight, but not too much wind. The capsicums are very heavy on the plants and the strong winds can break the plants as they are quite brittle.

How to grow: If you are starting with a seed, plant the seed in good quality soil either inside or outside, depending on your timing, in a seed tray. Make sure you water the seeds really well, and after about 10 days, the seeds will start to sprout. Then move the plants to a small pot about 7cm or 3 inches tall, and keep the plant in this pot until it is about the same height.

If you bought seedlings, or if you planted it from a seed, the steps are the same from here on! Then move the capsicum plant to the garden, or to a big pot if thats where you are wanting to plant it. Plant the capsicum in a good sized hole in the ground. Pat the soil down around the plant base, and then put a bamboo stake into the ground next to the capsicum plant.


Feeding your plants: Capsicums love nourishment! Make sure that you are giving them enough food. Using a liquid compost once every two weeks while the capsicums are growing is really important, as this gives them the nutrients they need to grow well.


Staking the plants: Because of the brittleness of the plants, capsicums need to be staked as they are growing. Putting a bamboo stake in the ground next to the plants is the best idea. The plants can then be tied to the stake using old stockings or something else that will be gentle on the plant. As the capsicum plant keeps growing, keep staking the plant up, so that is secure against the stake.

Important things to know: Good ventilation is important when growing fruits (or capsicums). So ensure that the plants have enough room for air to move freely. Watering the plants really well everyday is also a very important part of growing capsicums.


Harvest: Capsicums can be picked whenever you want to pick them really! The longer they are left on the plant, the more they mature, and the flavor changes. The above, and below capsicum are from the same plant, just the bottom one (reddish) was left on the plant for longer. This is because the plant I grew was a common capsicum. The capsicum starts out green, and ripens to orange or red! Beautiful! When you are ready to pick your capsicums, use scissors to cut the vegetable off, or you can damage the brittle plant!


Enjoy your capsicums, they truly are beautiful plants, and they are so simple to grow! If you have any questions, let me know! (:

Friday, 5 April 2013

My "Making Use of a Small Space" Garden

You're not always going to be able to live at a house that has land for you to establish your vegetable garden presence. So sometimes you just have to get creative, and use whatever space you can. Although I do have space for a vegetable garden, I do also have my patio/kitchen garden that I love.

I love it because I can look at it all the time if I want. I can easily pop out and get some vegetables, pick a couple of herbs to add to dinner, or even just easily water and tend it (as my main veggie garden is up a little hill). There is something so beautiful and creative about turning any little space you have into a garden. 

Have you heard of Guerilla Gardening? Google it. But basically, do it to your own place.

And I have some handy little tips to help you turn whatever dull, small, empty space into a thriving GARDEN.

Tip #1
Try to get some sunshine, (or light and warmth) onto your precious babies. This will help them to be the plants you dream they could be. Without getting technical, pretty much all plants need some light and warmth, so if you don't have the real stuff, then fake it some how!

Tip #2
Use whatever you can to plant in. This isn't really a tip, but I'm pretty much saying, you can make everything uniform in matching pots (very pretty), or you can mix and match whatever you have and whatever you can AFFORD. You may have heard the fancy term "repurposing". Its very fashionable and you can do it! I use mixes of old planter boxes, big plastic pots, little pots that some seedlings came in, as well as glass jars, little buckets, empty soup cans. You name it. If you can put soil in it, you can grow something in it. Go wild. And have fun. Just make sure there is some drainage (holes in the bottom).


Tip #3
Nourish your plants. As you will be planting in boxes or pots, your plants don't have the opportunity to gather nutrients from the surrounding soil as much as their counterparts out in the big wide world of the ground. This nourishment factor is so easy to over look, as we are so used to house plants, that you just water and leave, then water every so often. But your vegetables need your love. When you are planting your plants, use a really good quality organic soil or compost. As this will be the foundation for your plants long and healthy life. And make sure that they are being watered adequately, as often water can drain straight out the bottom of the plant, and not reach all the soil it needs to. And this leads to the next tip...

Tip #4
Feed your plants! Plant food, compost, whatever you want! BUT JUST FEED YOUR PLANTS! There isn't a lot of soil in those pots, and the plants need a lot of nutrients to grow! I like to use and organic (liquid) plant food, that I treat my plants to every one or two weeks depending on how well they are growing, or what they are (heavy fruiting plants need more than leafy plants). I grow strawberries on my patio, and I make sure that they get strawberry food (its a real thing!), as this helps them to grow, even in the small pots.


Tip #5
Plant things that you wouldn't plant in your big garden. For example, in my kitchen garden, I grow wheatgrass, because it works better in a tray, and its good for it to be nice and easy on hand. Get creative and think outside the (planter) box.


Tip #6
Plant "cut and come again" plants. These are plants that you literally take a couple of leaves off, and then you can come back to them again later and take a few more leaves off. You don't have to harvest the whole thing at once. In my small garden, I like to plant lettuces, spinach, kale and swiss chard, as they are fast growing, but they are also very handy and useful plants in terms of eating. 


Tip #7
Have a few flowers in your small potted garden. Having some flowers will help to attract the good bugs, and may even help to keep the bad ones away (depending on what you plant). It is very important to make sure that your little garden (or big) is getting pollinated, and if no bees do it, make sure that you do it for the plant (depending on what plant it is!) because that is important in the growing stage for some plants!

Tip #8
Move your plants around. For two reasons. The first reason is to create companion planting. Putting some plants next to others is a good thing (for example tomatoes and basil), they enhance one anothers flavour while growing, whereas putting tomato and cabbage next to one another is bad and stunts growth. So move those babies around to get the best possible growing happening. Secondly, move them around to get the best sunshine for the plant. If you are like me, your planting area isn't in the sun all the time, so move those babies around a couple of days a week so that they can soak up some nice rays. They will thank you for it in beautiful vegetables.


Tip #9
Start small, and increase. You don't need to have 50 pots of varying varieties of vegetables the first day of your garden. I started with two pots, and slowly but surely I kept adding and collecting, and now I have many random containers, and some random plants. If you start small, its easier for you to manage, and make sure that those vegetables are getting the love they deserve. Add a few more to your collection every couple of weeks or so. This leads to the final tip...

Tip #10
You can increase the container size if you want. Say you planted a tomato plant in a small pot, but now it seems that it is just getting too big for that pot, well never fear, buy a slightly bigger (or much bigger if you are super keen) container, and just move your little friend into a bigger home. Plants will only grow until their roots can't grow no more, so the bigger the space for roots, the bigger your plant will be. And once you've moved that plant into a bigger container, you have a spare container to start something else in. Its like the circle of life. Only different.

But most importantly HAVE FUN!! And remember, you are only limited by your imagination, so get out there are get creating your own little piece of vegetable paradise.

Tuesday, 2 April 2013

Kale - Your new best friend

Yes. Kale. YOU WILL FALL IN LOVE. No jokes.

Let me tell you why.
1. Its super good for you
2. Its easy to grow
3. Its yummy

Are you sold?!

Well let me tell you a bit more about kale, as you will have a long and happy relationship with this beautiful plant if you listen to what I have to say!

So what is Kale?!

Photo from Walmart.com
I like to think of Kale as a combination of broccoli, swiss chard (silver beet), and spinach! It is actually from the same plant family as broccoli and brussels sprouts! And Kale... wait for it... IS ONE OF THE HEALTHIEST VEGETABLES IN THE WORLD! AHHH!!

And in easy to understand terms, Kale has a lot of fibre in it (good thing), is low in calories (good thing), high levels of Vitamin A, C and K (very good things which keep you healthy!), and kale helps to lower cholesterol levels and keep your heart healthy! This is the super plant!

So how do you grow the "Queen of Greens"?!

So just like with all plants, get your seeds and plant them in some really good quality soil. However, with kale, you want to plant it when the weather is cooler, although you can plant kale all year round, so long as it doesn't get too much hot sun. So where ever you plant your seedlings (if in summer), make sure its a place that gets just morning sun, as this tends to be cooler. But generally, planting the seeds in spring is ideal!


6 weeks after planting the seeds, transfer them to where you want to plant them. When planting, ensure that there is around 2 feet, or 60 cm spacing between the plants, as these beauties can grow large! And like all plants, make sure that they are watered adequately. Also using an organic plant food is a good idea, as this helps to get all the right nutrients to the plant so that it grows really well. As it is a leafy plant and you eat the leaves, putting the organic plant food just at the base of the plant, rather than on the leaves is a good idea, and still will be just as effective, if not more.

I personally, am growing my kale in my kitchen garden, as it does grow well in pots as well! This is good for me, and I can move the pots to get out of the sun! And its easy for me to harvest it!

BONUS: Because this plant does best in cooler temperatures, if it frosts while the plant is at least 6 weeks old, the frost is actually beneficial for the plant, as it makes the leaves a bit sweeter! 

Outer leaves can be harvested as you go, so if you need a few kale leaves, just pull a few off! The great thing about kale is that it has many uses, and I will definitely be posting about these in the future. But as a general rule, the outer leaves, which are older, are better for cooking, and the small tender inner leaves, are perfect for salads.

So please give kale a try! You will love it!

Friday, 15 March 2013

ANTS ON MY CORN

AHHHHHHH!!! I hate ants. Seriously. I hate them. Yuck. They get on you and crawl around really fast. UGH!

And guess what. My corn has ants. What the?!

WARNING! GROSS PICTURE BELOW!


It looks like they've laid eggs and they're just all over it!

Has anyone else had this before??

I did some reading on this, and apparently it can be because of aphids! The ants herd the aphids like how humans herd cows! Apparently the aphids produce a sweet by-product that the ants love! A lot of people have found that the ants aren't damaging the corn, but I find it really gross! So I was like, how do I get rid of them?!

WATER!

Just get a hose and blast them off! I will definitely be trying this! And I guess you just keep blasting them off until you are ready to pick your corn! Sounds easy enough! Loves it!!

Thursday, 14 March 2013

What is on my leaves?! Powdery Mildew! Yuck!


Yucky, yucky, yucky. Powdery mildew.

Yucky.

What is it you ask? Its a fungal disease, that no plant is immune to. So bearing that in mind, its useful to know how to treat it! As even the best gardener may have a powdery mildew attack.

How do you know if you have powdery mildew? Well your plants will basically look like the above photos. The surface of the leaves, or underneath, or steams even, will be covered in a silvery, grey powder. It is quite matte, and makes it look like your plants have died when you look from afar which often causes gardeners to have panic attacks until they get closer and notice that it is powdery mildew.

Its important to stop powdery mildew from spreading as quickly as possible, as it can potentially stop a plant from fruiting.

As you can see in the above photos, the powdery mildew spread between my courgette plant to my squash plant while I was away for the weekend. Powdery mildew is very common when there is hot humid weather, but watering the leaves of plants actually helps to spread this disease. So in humid weather especially, make sure you are just watering the base of the plants. Dry plants, crowded planting, or poor air circulation also helps to spread this nasty, so ensure that your plants have enough room when you are planting them and that you are watering them well in the hot summer months, as this acts as a preventative measure!

So now you know the important things about powdery mildew, what exactly are you supposed to do??

If just a few of the leaves are affected, pull those out quickly and dispose of them. This helps to remove the fungus, but can also improve air circulation as the plant is getting slightly pruned. If the powdery mildew has spread to most of the plant (as what happened to my babies), using a baking soda spray (an inexpensive, and not dangerous fungicide) is something that really helps. It can also be made organically!

The basic "recipe" for this is
1 Tbsp baking soda
1/2 tsp liquid soap (not detergent)
3.8 litres of water (1 gallon)

Spray this onto leaves of the affected plant when the plant is in shade (in the evening is ideal). Also ensure that the plant has been watered the day before as well, so that the plant isn't too thirsty. This can be repeated every one or two weeks, depending on how your plant is going. Make sure that you don't store the unused mixture though as it is more effective when used straight away!

And hey presto! Your powdery mildew should start to disappear and your beautiful plants will become happy once more!

Wednesday, 27 February 2013

Roasted Tomato Pasta Sauce TO FREEZE


After following this guide to growing awesome tomatoes you will end up with dozens of tomatoes! We have slowly been picking a few tomatoes over this past month as they start to ripen, but this week we had a bumper harvest where the majority of our tomatoes became big, juicy red fruits at the same time!


Like all good gardeners, we wanted nothing to go to waste. No tomato to sit too long in the fridge and become inedible. So I was looking at ways to preserve these beautiful rubies. Freezing whole tomatoes is a no-no. It destroys the flavour and the texture goes funny. Not nice. Sun-drying tomatoes is great, but I didn't have a dehydrator, we don't get hot enough temperatures in New Zealand, and I don't like the idea of leaving my oven on for up to 40 HOURS!! 

So, I decided that my best bet to preserve flavour not just the fruit, was to make a pasta sauce. And what better way to intensify tomato flavour than to roast them first! And the great thing about this sauce, is you don't need to stand over a hot pot for hours! You just need an oven and a food processor!

So here is my recipe for ROASTED TOMATO PASTA SAUCE

(from 45 normal sized tomatoes, I got 1.8L of pasta sauce!)

INGREDIENTS:
-tomatoes
-salt
-pepper
-oil
-crushed garlic


1. Wash all the tomatoes you have on hand. I had around 45 normal sized tomatoes. And preheat the oven to 160 degrees C (320F).
2. Slice the tomatoes in half and place cut side up on a baking tray. I had a couple of yellow cocktail tomatoes so I chucked those in too to roast.
3. Drizzle the tomatoes with oil - I used canola cos that was all I had, but olive oil can be used instead if thats what you have!
4. Season generously with salt and pepper.


5. Roast the tomatoes for half an hour, and after this time pour off all the liquid on the trays (there will be a lot).
6. Return to the oven for another 5 minutes just to get a bit more colour on the tomatoes, as this will be more flavour!!


7. Brush the tomatoes with crushed garlic so that there is a little bit on each one.
8. Wait for the tomatoes to cool for about 20 minutes on the trays and then transfer to a food processor. I used a magic bullet!


9. After processing, the pasta sauce will be thick and creamy and absolutely delicious!!!!


10. At this stage I transferred the sauce to snaplock bags in serving sizes, which I then labelled and put in the freezer! However, if you are going to use it straight away then you can add any herbs that you would like! I kept mine nice and simple, and when I use the pasta sauce, I will season with herbs to match the dish!


 11. This pasta sauce can be used as a pasta sauce, or in pasta bakes, or even in lasagna! Yum yum yum! Just place in a pot or a microwave proof dish to slowly defrost so that it can be used!


ENJOY!

Monday, 11 February 2013

Making a raised flower bed

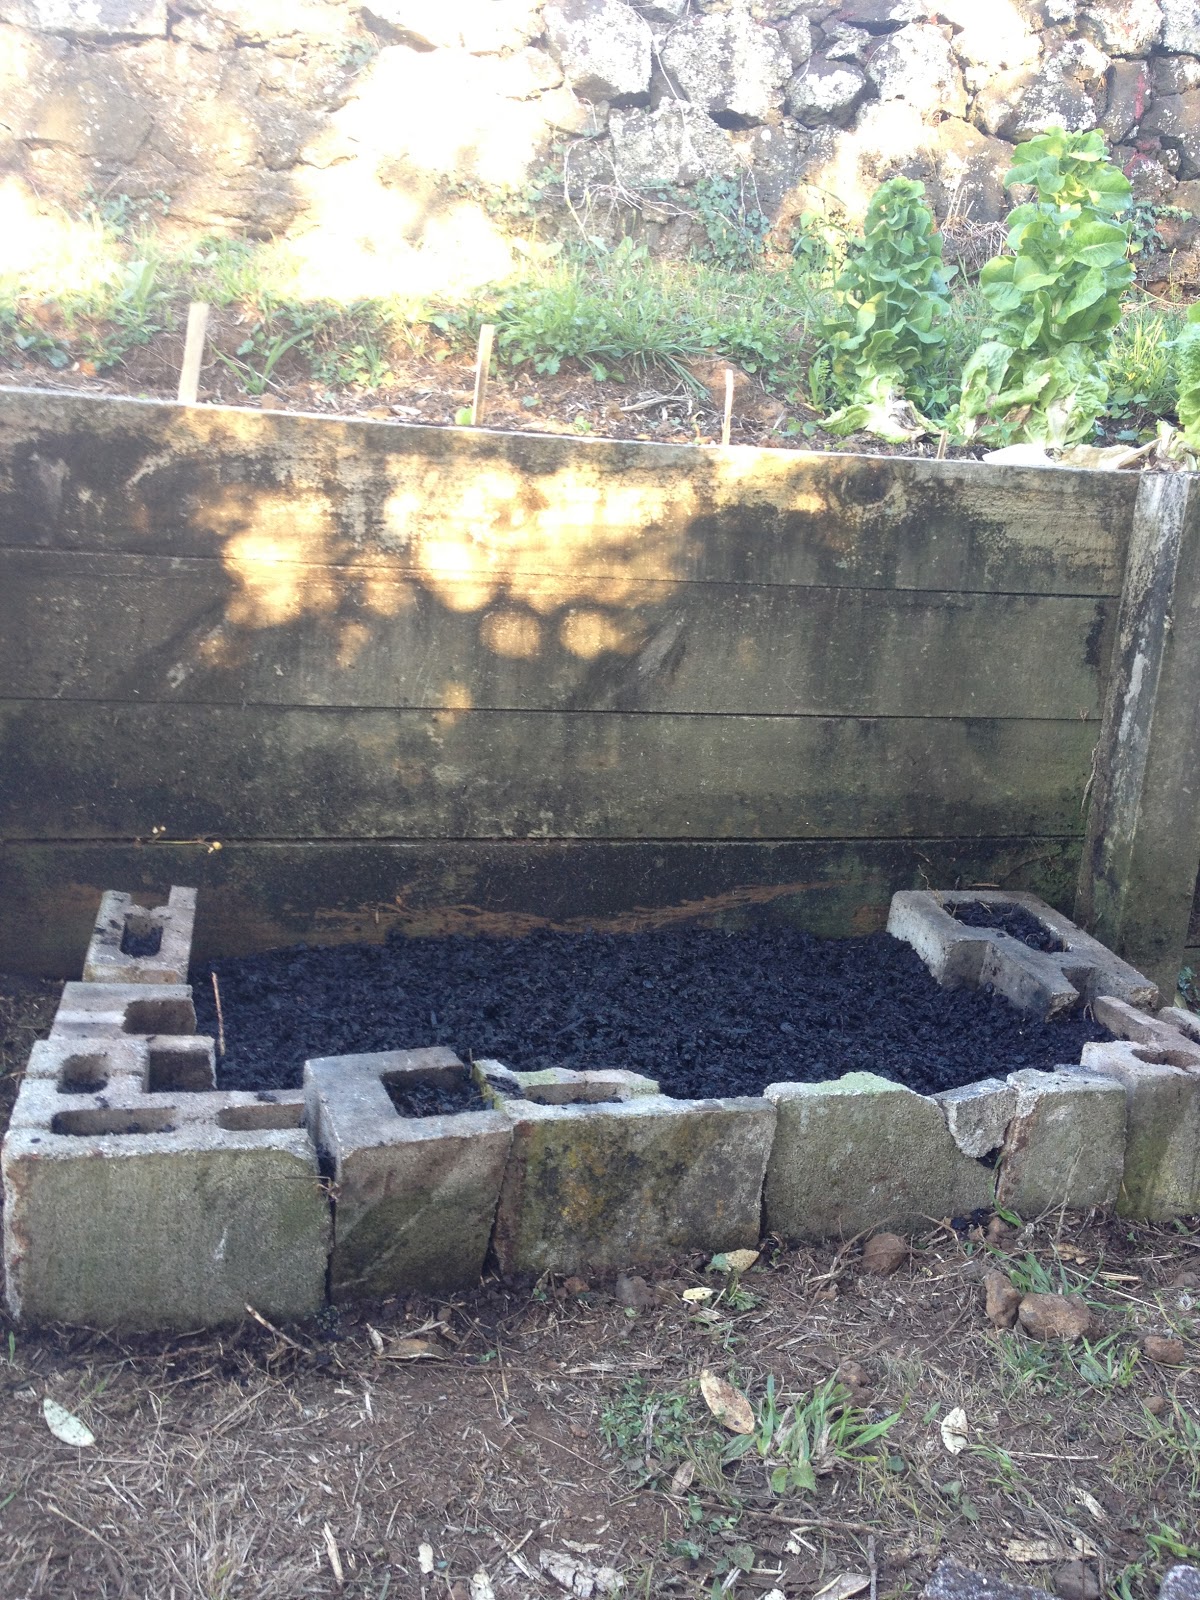
So today, we killed two birds with one stone. Or rather, cinder blocks (hehe). We had an old incinerator  next to our veggie garden that was a) ugly, b) stopping us from extending our veggie garden and c) made of bricks. Which was great because a) I wanted more planting space, b) I wanted to get rid of the incinerator and c) I didn't wanna spend a lot of money!

So here is my guide on how to build a cheap raised garden (even if you don't have an incinerator you wanna get rid of)!


1. Mark out the space that you want to create your raised garden in! To start with we laid out left over stakes from the tomatoes. These were easy to move around and gave us a good visual representation of how big, and how practical the garden was going to be.
2. Assemble the materials. You'll need a spade, some soil and some organic compost, and the bricks/rocks that you are going to use to make the garden.
3. Using the spade, cut into the ground, to mark out the space.
4. Dig a slight trench into the ground about the width of the bricks, so that they can sit easily in the ground, while being level, and not tipping over.
5. Dig up the grass or dig over the soil that is the base of the raised garden at the moment.
6. Place the bricks in the ground, and then fill the garden with soil and compost until the bricks are firmly in the ground. Packing the soil round the bricks, while moistening it helps to do this!
7. The bricks I used had holes in the top of them, so I filled these with soil to create extra weight, and so that flowers can grow in them too! You can do this too if the bricks have space, or otherwise just skip it!
8. Water the garden until the compost and soil is moist.
9. Plant whatever seeds or seedlings you would like. I am turning mine into a flower bed, so I planted a mixture of flower seeds!
10. Water well and enjoy your new raised garden!


P.S. It doesn't need to look pretty, cos once the plants are growing, its going to look amazing!!

Our Garden Progress - February


HEARTBREAK

It was a very sad day. One of our tomato plants unfortunately snapped after a lot of rain and strong wind. And this is why you HAVE to read THIS and THIS!!! I don't want this to happen to your tomato babies!!!